
Outdoor signage waterproofing is not a promise that a sign can survive unlimited water exposure. It is a controlled specification covering the enclosure, electrical components, cable entries, drainage, mounting orientation and the test evidence behind the finished configuration. Buyers get better results when they define those items before quotation instead of relying on one IP number after the design is complete.
Use this guide to turn the phrase “outdoor rated” into a practical purchase specification. It explains what to put in your enquiry, what documents to request, how to divide factory and installer responsibilities, and what to check before shipment and after installation.
The short answer is that an outdoor sign should resist the exposure defined for its application. An IP65 component has passed dust and water-jet tests under specified conditions; that does not automatically make the complete installed sign IP65, suitable for immersion, or safe to pressure wash.

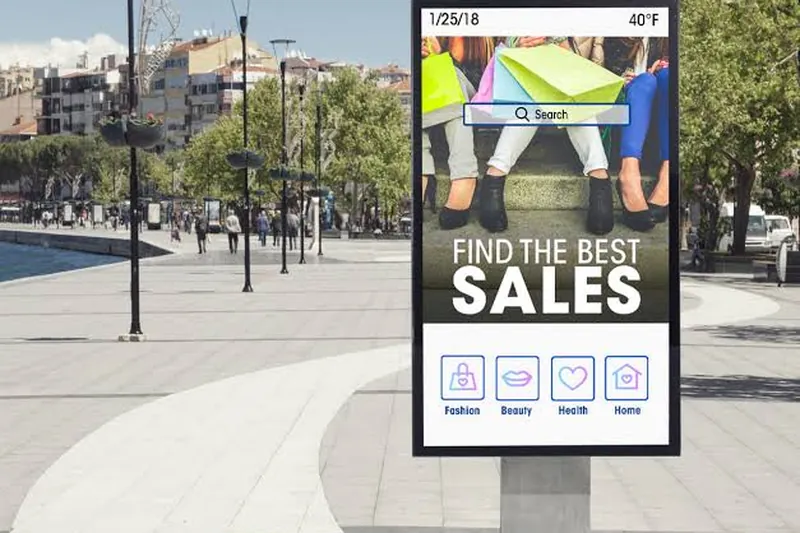
Outdoor Signage Waterproofing Starts With a Defined Boundary
Before comparing suppliers, decide what is inside the waterproofing boundary. Is the claim limited to an LED module, or does it include connectors, the power supply, the fabricated housing and every field cable entry? A buyer should be able to trace the protection path from the sign face to the final wall penetration.
The installed assembly is only as reliable as its least protected point. A sealed LED module does not compensate for an indoor driver mounted in an exposed cabinet. A gasketed enclosure does not protect a cable hole drilled on site and left without the correct gland. Write the boundary into the quotation so supplier evidence can be checked against the product you will actually receive.
Translate the IP Code Into a Buying Decision
Under the official IEC 60529 enclosure-protection standard, the first digit describes protection against solids and dust, while the second describes water protection under a defined test. IP65 means a tested enclosure is dust-tight and resisted water jets. IPX7 addresses temporary immersion, and IPX8 covers continuous immersion under product-specific conditions. These tests describe different exposures; a larger second digit is not a universal upgrade for every outdoor site.
For the technical meaning of the code and common interpretation errors, see Hicen’s technical explanation of outdoor signage IP ratings. For purchasing, the more important question is whether the report applies to the same materials, joints, orientation and cable routing shown on your approved drawing.
| Buyer question | Evidence to request | Decision it supports |
|---|---|---|
| What was tested? | Report model, drawing or controlled product family | Whether the claim applies to your enclosure |
| Which standard and edition? | Test method, laboratory and report number | Whether two supplier claims are comparable |
| What changed after testing? | Approved materials, revisions and substitution controls | Whether current production still matches the evidence |
| What happens during installation? | Mounting drawing and cable-entry instructions | Whether field work creates a new water path |
Build a Component-by-Component Protection Schedule
A useful quotation separates the sign into components. Record the required rating, location and sealing method for each item rather than accepting one rating in the product description. This is particularly important for illuminated channel letters, light boxes and freestanding digital displays because their power architecture and service access differ.
| Item | Put in the specification | Typical failure to prevent |
|---|---|---|
| LED module | Rated module and connector combination | Moisture reaches an unsealed lead or connector |
| Power supply | Outdoor rating, mounting location and service clearance | Indoor driver placed in a damp enclosure |
| Cable entry | Gland size, sealing method and downward routing | Water tracks along the cable into the housing |
| Housing and face | Material, seam design, gasket or sealant and drainage | Aged joint retains water or opens during thermal cycling |
| Wall interface | Installer sealant, fastener and penetration detail | The sign is sealed but the building penetration leaks |
Specify Sealing, Drainage and Service Access Together
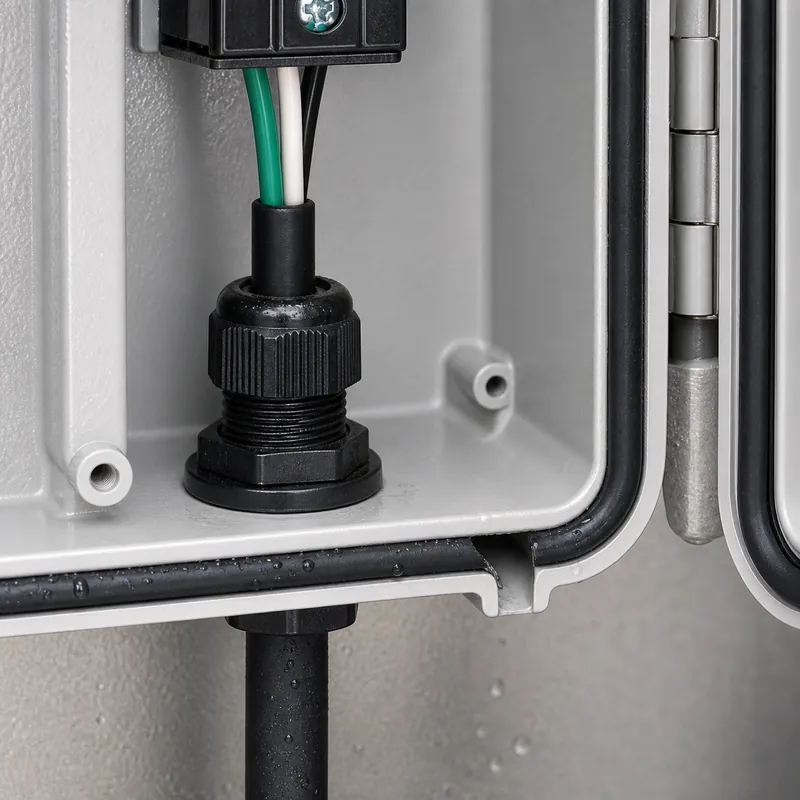
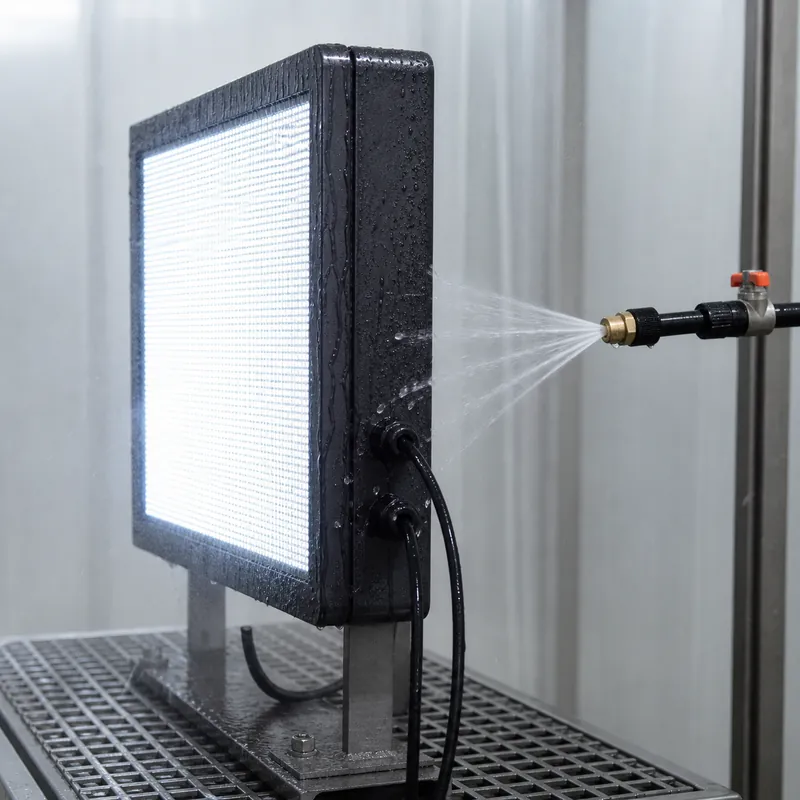
Water resistance comes from a system of details: compatible gaskets, sealed seams, correctly sized glands, insulated connections, controlled adhesive joints and a route for incidental water to leave. Sealing every opening without planning drainage can trap moisture. Making an enclosure impossible to open can also turn routine driver replacement into destructive field work.
Ask the supplier to show the service direction, removable covers and resealing procedure. For Hicen product families such as custom LED light boxes, the correct solution depends on enclosure depth, mounting orientation, face material and where the driver will be serviced.
Design for Condensation Before It Looks Like a Leak
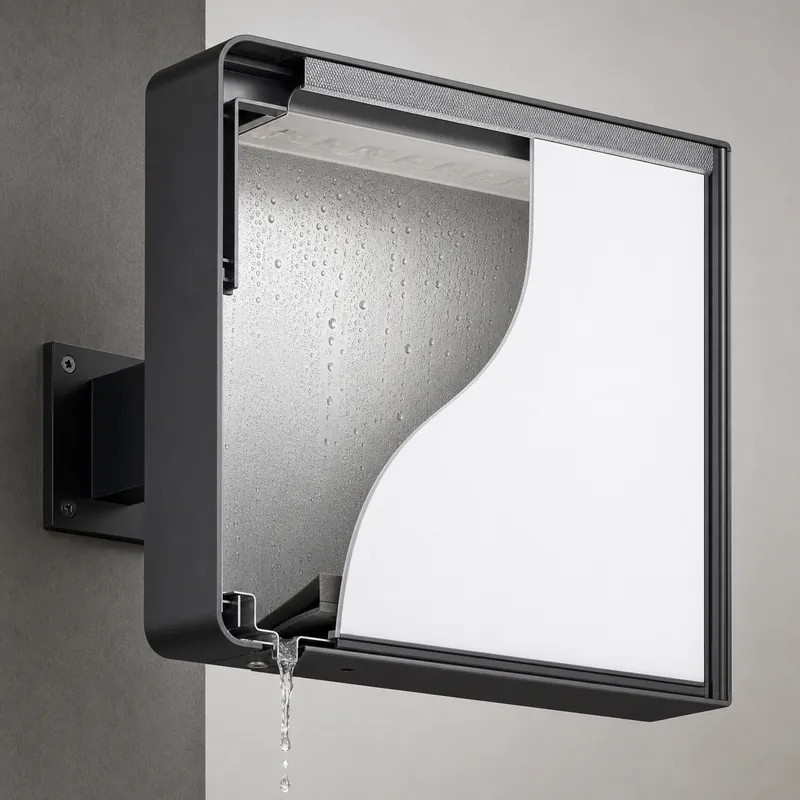
Moisture inside a sign does not always prove rain entered through a failed seal. Air inside the housing expands and contracts as temperature changes. When a surface falls below the dew point, water can condense inside an otherwise intact enclosure. Rooftop locations, humid climates and large day-to-night temperature swings make this risk more important.
The buyer specification should therefore cover internal humidity management. Depending on the design, that can include breather membranes, protected vents, low-point drainage and enough internal clearance to keep wiring away from collected moisture. Compare the proposed design with the expected service life and maintenance plan described in Hicen’s LED signage durability guide.
Adjust the Specification for the Real Exposure
“Outdoor” is not one environment. Give the supplier the installation city, orientation, mounting height and exposure before design approval. Coastal salt, wind-driven rain, rooftop heat, freezing conditions and routine washdown create different combinations of corrosion, pressure, UV and thermal-cycle risk.
| Site condition | Add to the enquiry | Supplier response to verify |
|---|---|---|
| Coastal or industrial air | Distance from coast and known contaminants | Metal grade, pretreatment, coating and compatible fasteners |
| Exposed façade or rooftop | Orientation, height, sun and wind exposure | UV, thermal-cycle and structural details |
| High humidity | Humidity range and operating schedule | Ventilation, breather and condensation drainage |
| Washdown or irrigation spray | Nozzle direction, pressure and frequency | A rating and test method that match the exposure |
Turn Test Reports Into an Acceptance Plan
Keep design verification, production control and order acceptance separate. A type-test report supports a product design. In-process checks confirm materials and workmanship during manufacturing. Batch acceptance records show what was checked for your order. One document cannot replace all three.
Hicen’s published process includes incoming inspection, in-process patrol, semi-finished sampling, finished-product inspection and a final recheck before packing. Published checks also include a 48-hour power-on aging test, water-spray checks on glue joints, wire outlets and panel bonding positions, and a full-load power-supply run. Review the broader sign manufacturing workflow and quality-control stages, then state which order-specific records you require in the quotation.
Do not treat a short factory spray check as equivalent to an accredited IP test. It is a useful workmanship screen when its method and acceptance criteria are defined, but it does not create a new certified rating.
Control the Factory-to-Installer Handoff
The factory can control fabricated seams, supplied components and the configuration shipped. The installer controls wall penetrations, junction-box placement, field joints, driver location and modifications made on site. Record both responsibilities before installation, including who supplies glands and sealants and who photographs concealed work.
Require cable entries to face downward where the design allows, prevent junction boxes from collecting standing water, and reseal any fixing that passes through the housing. Pressure washing, drilling or changing the orientation can move the installation outside the tested configuration and warranty scope.
Assemble the Buyer Submittal Package
Send at enquiry
Provide the installation city, climate and orientation; sign dimensions and mounting height; wall construction and available wiring space; operating voltage and ambient-temperature range; quantity, destination and Incoterm; target service life; and any project-specific test or documentation requirement.
Require before design approval
Request a component schedule, enclosure and drainage details, cable-entry drawing, driver location, service-access method, applicable IP evidence, material and coating specifications, and a list of changes that would invalidate the protection claim.
Collect before shipment
Collect approved drawings, component datasheets, agreed inspection records, installation instructions, packing identification, warranty terms and dated photographs of cable entries, seams and the completed enclosure. Agree any witnessed testing before production because it can affect price and lead time.
Apply This to Your Outdoor Sign Project
A defensible outdoor signage waterproofing specification connects the site exposure to component selection, enclosure details, production evidence and installation work. Do not approve the sign from a single IP claim. Approve the protection path and the documents that prove each part of it.
Send Hicen your site conditions, sign dimensions, mounting information and design files. We can prepare a preliminary component and enclosure recommendation for quotation; your installer or local engineer remains responsible for site installation and applicable electrical, structural and permitting requirements. Request a project-specific waterproofing proposal or review the available custom signage product range.
Buyer FAQs
What should an outdoor-signage waterproofing specification include?
Include the exposure, component ratings, enclosure and seam design, cable-entry method, driver location, drainage or breathing strategy, installation responsibilities, test evidence, batch records and warranty exclusions.
Can I specify IP65 for the whole sign?
Only when the supplier can show that the claim covers the complete configuration or a controlled design family that includes it. Otherwise, specify and verify the relevant components and enclosure separately.
Which waterproofing details should appear on the approval drawing?
Show cable and wire outlets, glands, seams, gaskets, removable covers, driver position, drainage points, ventilation or breather locations, mounting orientation and any field penetration through the housing.
How can a buyer reduce waterproofing disputes after installation?
Agree the factory and installer scopes in writing, approve the protection details, photograph concealed work, retain batch and installation records, and document maintenance or field modifications that could affect the enclosure.